Blog
Easter nest from yeast dough & DIY Cake Topper
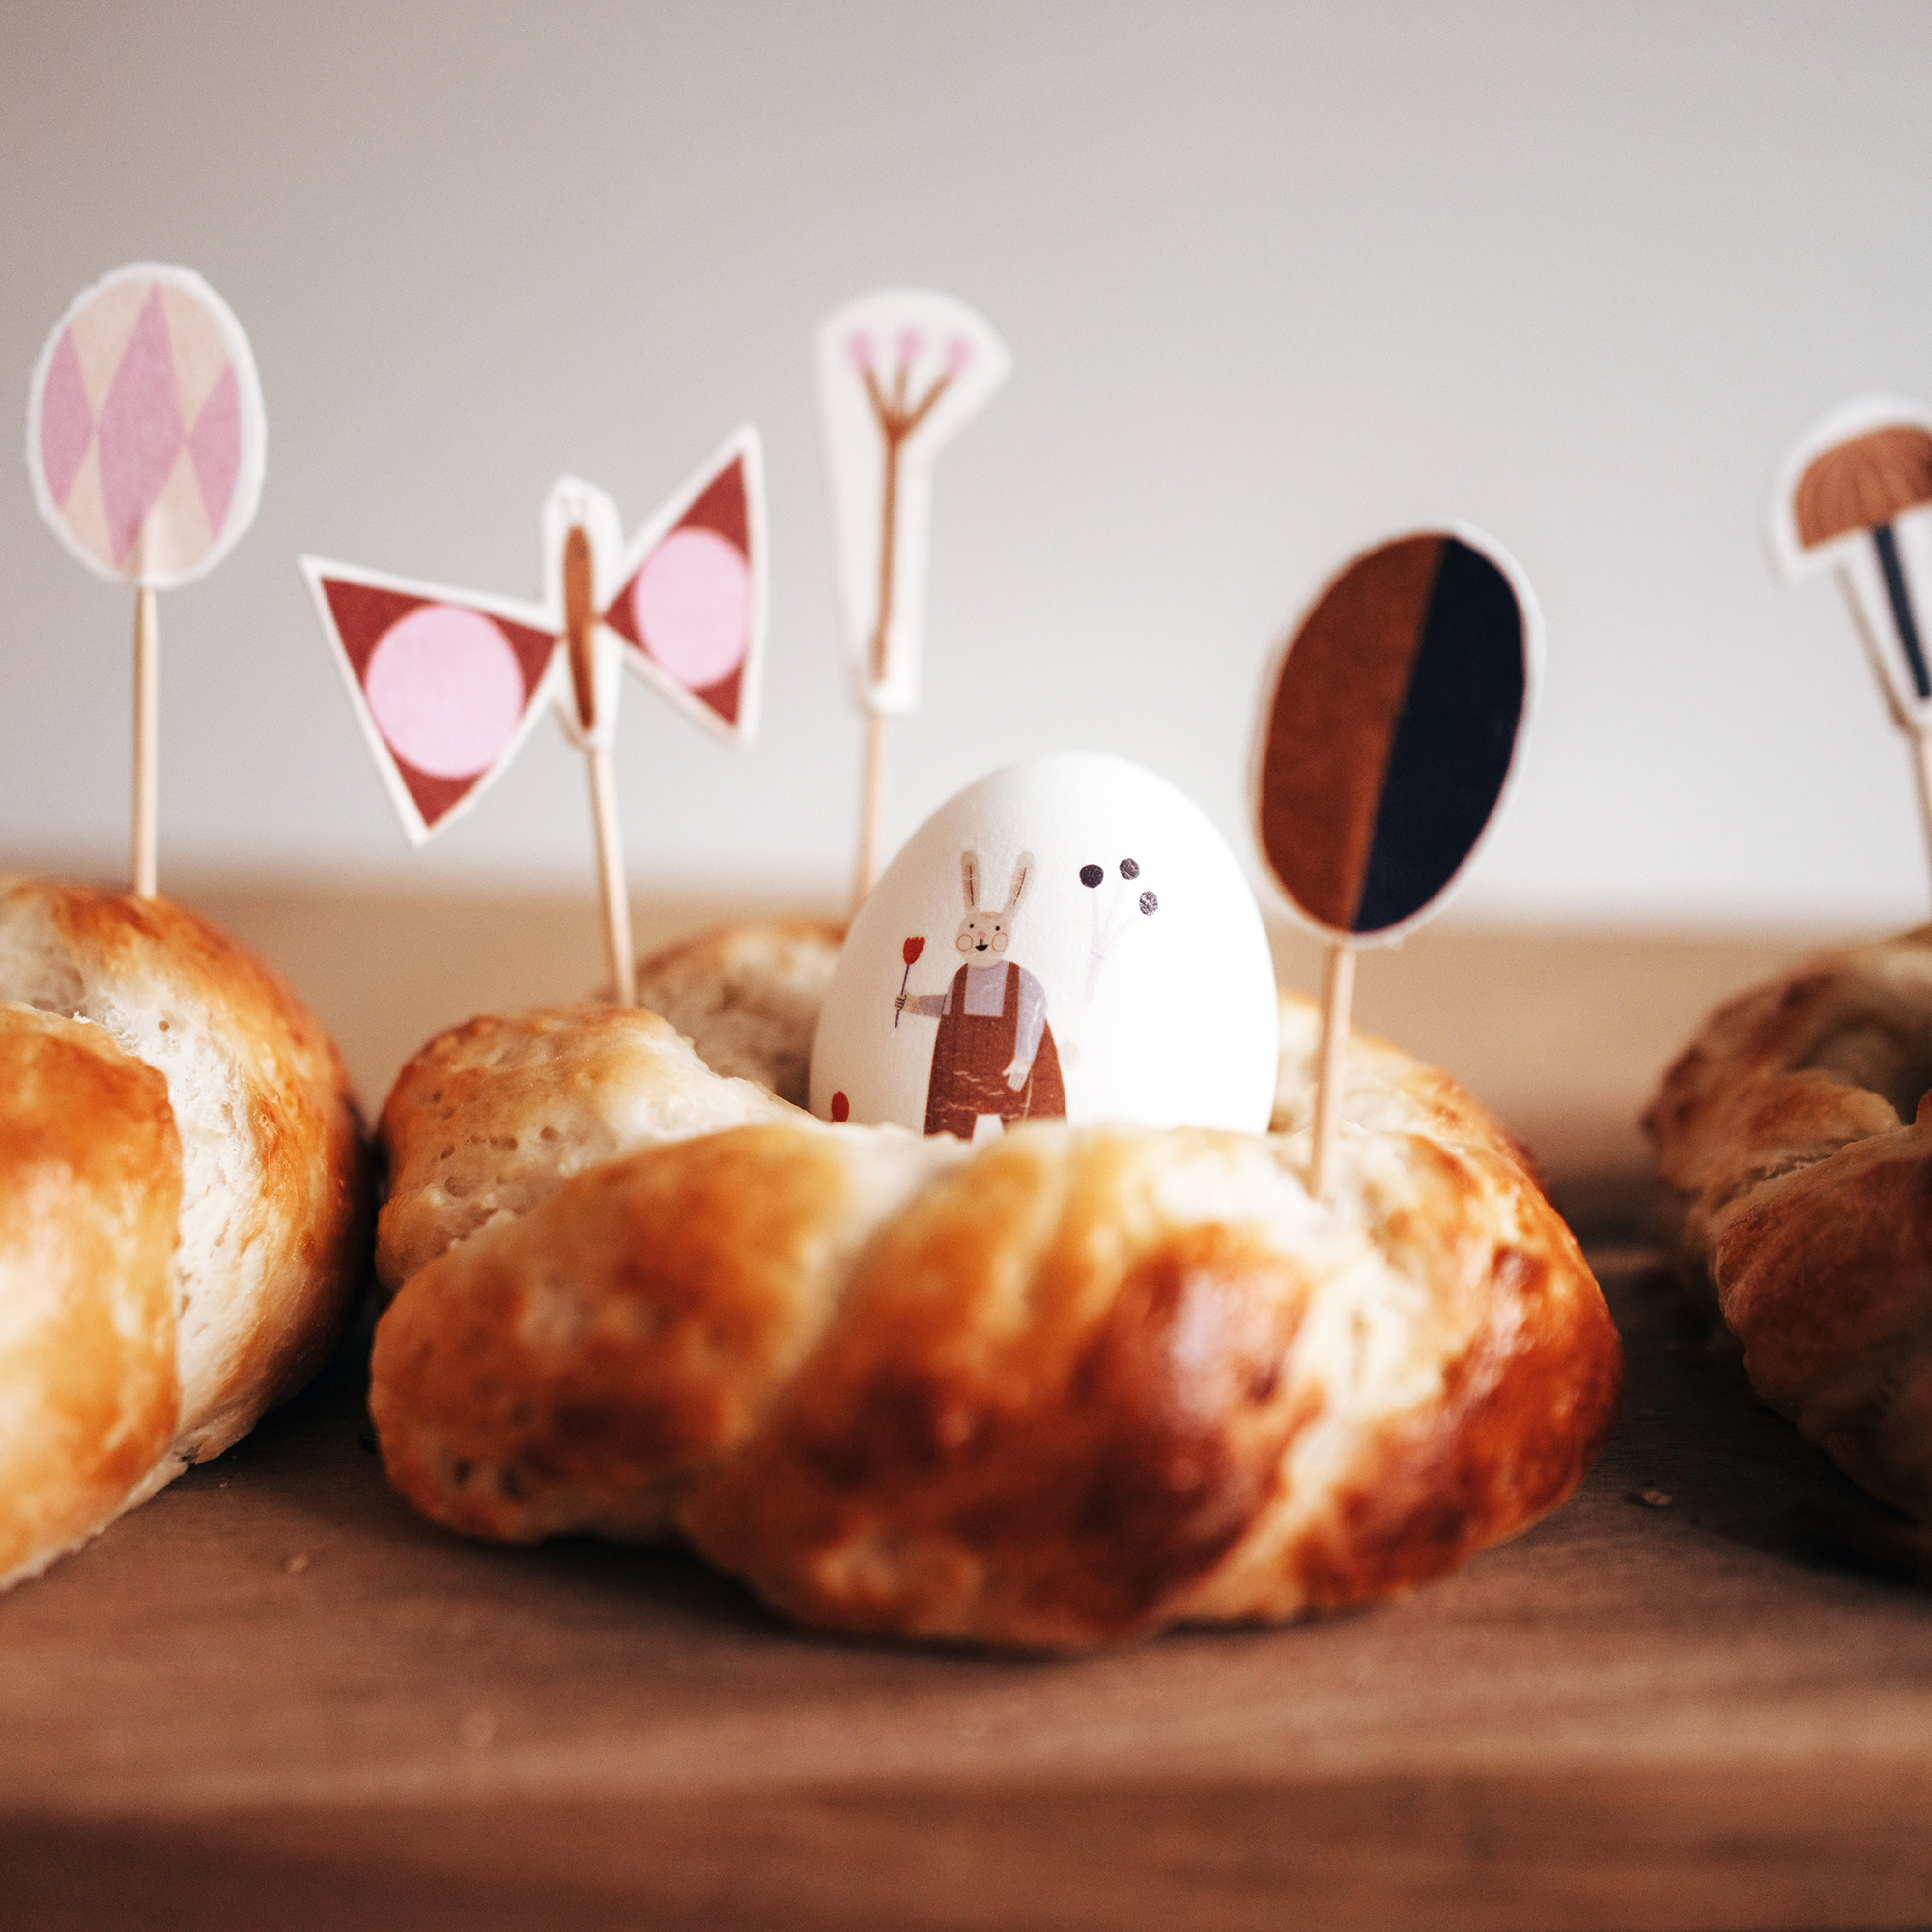
It’s hard to say what was more awesome as a kid: searching for the Easter nest, or feasting your way through the Easter table. Alright, the Easter nest search wins, but sitting at the decorated Easter table comes right after! And even as an adult, I still love Easter because it’s simply THE celebration that heralds spring for me.
And so that the Easter table in also this year is a guaranteed eye-catcher, we have made a few thoughts. Starting with a cute treat, an Easter nest made of yeast dough and topped off with matching Easter decorations in the form of Cake Toppers, which can be made in no time from our postcards.
Let’s start with an Easter wreath – but a different kind: A delicious and decorative alternative to the traditional German braided Easter wreath: an edible Easter nests made of yeast dough. Baked golden brown, they are popular delicacies that can also be easily baked together with children. Perfect for getting in the mood for the holidays and shortening the wait for the Easter Egg Hunt. Especially pretty look the Easter nests from yeast dough then still with the tattooed nuukk Easter eggs. We just love our new Easter motifs and therefore we have made small cake toppers for the Easter nests from a postcard. Together with a bouquet of fresh flowers, the decoration for the Easter table is then ready.
The vegan kids tattoos are of course also perfect for the Easter nest and with our Easter postcards you can send a happy Easter greeting.
What ingredients do you need for the Easter nest from yeast dough?
You need:
- 6 white eggs, boiled and stamp removed with vinegar
- Another 6 eggs for baking
- Nuukk tattoos with Easter motifs
- Scissors and damp cloth
For the dough:
- 500g wheat flour
- 250ml lukewarm milk
- 70g sugar
- ½ tsp salt
- 21g fresh yeast
- 75g soft butter
- 1 egg for coating
How to bake an Easter nest from yeast dough?
- Mix the lukewarm milk with the sugar, crumble the yeast directly into the milk and mix well until everything is dissolved.
- Now put the flour in a large bowl, add the butter and salt and fold in the yeast, sugar and milk . Knead everything into a smooth dough, either by hand or with a food processor and dough chopper.
- Now the dough must rise and double the volume. For this it must rest covered in a warm place.
- When the dough has risen nicely, you can form small Easter nests from it. Divide the dough into 6 equal pieces. Then divide these six parts by two again. Now form two parts into rolls and then twist them around each other. Now form it into a nest and press the two ends together.
- Place the nests on a baking sheet lined with parchment paper and stick a raw egg in the center. Now let the nests rest for another 10 minutes and preheat the oven to 200 degrees convection. Before you put the tray in the oven, brush the nests with the egg yolk. Bake the nests for about 15-20 minutes until golden brown.
- In the meantime, you can already cut out the tattoos and stick them on the boiled and cleaned eggs. The best result is obtained when using white eggs.
- We made little cake toppers out of a card and toothpicks, with the same designs as the tattoos. If you don’t have the card for this, you can also simply cut out the pictures of the packaging and attach the toothpick to the back with a sticky strip.
- After baking, you need to let the nests cool down nicely, then remove the eggs, which were baked along. (These are hard and can be eaten, so No Foodwaste!) and now easily replace with tattooed boiled eggs.
And now, Bon Appetit and Happy Easter!
 Novelties
 Küche
Küche Cutting Boards
 Serving Trays
 Kids Tattoos
 Iron On Stickers
 Calendars
 Air Freshener
 Aufkleber
 Washi Tape
 Papieraufkleber
 Reflective Stickers
 Porcelain Stickers
 Schreiben
 Postcards
 Notepads
 Desk Pads
 Folders
 Kinderzimmer
 Kids Posters
 Baby Rattles
 Cushions
 Music Boxes
 Sale
Sale Serving Trays
 Porcelain Stickers
 Postcards
 Notepads
 Desk Pads
 Kids Posters
 Baby Rattles
 Cushions
 Music Boxes


